Has your PC suddenly turned into a high-tech doorstop? Press the power button but get no lights, fans, or boot screen? If your motherboard has ever been “bricked” and rendered unusable, don’t despair – many times it can be revived!
As a long-time PC repair technician, I’ve successfully resuscitated countless bricked motherboards using BIOS recovery techniques, reflashing, and other troubleshooting methods.
In this in-depth guide, I’ll walk you through step-by-step how to diagnose and fix a bricked motherboard using the tools you have on hand. We’ll also cover preventative tips to avoid the dreaded bricked scenario in the first place.
First of all, you need to know what is a bricked motherboard!
What is a Bricked Motherboard?
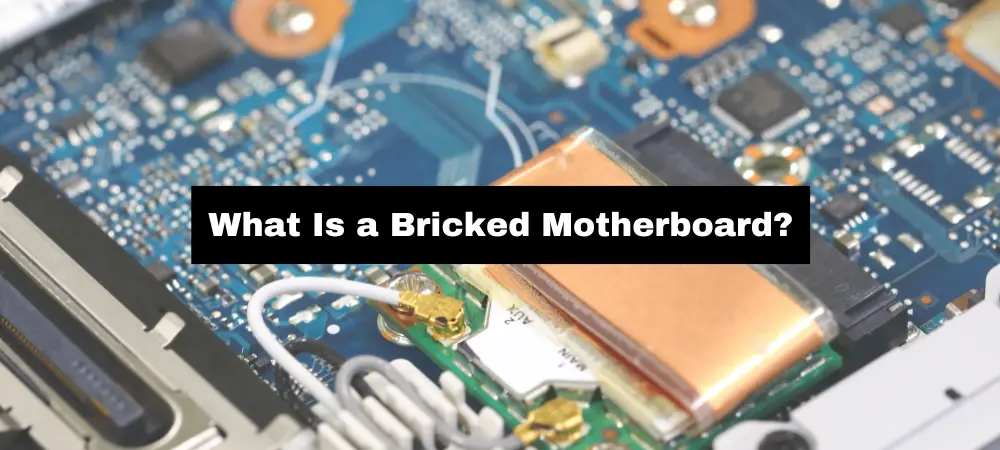
A bricked motherboard is every PC builder’s nightmare. You go to turn on your computer after finishing your new build or upgrading components, press the power button, and…nothing. The fans don’t spin, there are no lights or POST beep codes, just a completely dead system.
A bricked motherboard refers to a motherboard that is no longer functioning due to a failed BIOS update or other hardware issue. When you attempt to power on a computer with a bricked motherboard, it will not boot up or POST (power-on self-test) properly. This renders the motherboard inoperable until the specific issue can be troubleshoot and resolved.
Causes of a Bricked Motherboard
Based on my experience troubleshooting all kinds of PC and motherboard issues over the years, I’ve found these to be the most common culprits behind a bricked board:
Failed or interrupted BIOS flash:
This is the most common cause that people usually face. BIOS (Basic input/output system) contains the firmware code that the motherboard needs to start up. Flashing is the process of updating the firmware by overwriting the chip with a new BIOS version downloaded from the manufacturer.
Incorrect BIOS version flashed
If you flash the wrong or incorrect BIOS version to your motherboard, it can cause the motherboard to become bricked. Motherboard vendors release customized BIOS versions tailored specifically to each model number they sell.
If an incompatible BIOS firmware meant for another board is inadvertently flashed, it will likely conflict with the board’s chipset, CPU socket, RAM slots, etc. leading to failure. It is important to make sure that you are flashing the correct BIOS version for your motherboard model.
Sudden loss of power during BIOS update
One of the most vulnerable times for a motherboard is during a BIOS update, as an unexpected power interruption can corrupt the firmware flashing process and brick the board. The BIOS chip can be left partially overwritten if power is suddenly lost in the middle of the update procedure.
If the power is lost to your computer during a BIOS update, it can also cause the motherboard to become bricked. This is why it is important to have a UPS (uninterruptible power supply) connected to your computer when you are flashing the BIOS.
Hardware Failure
Faulty hardware components like CPUs, RAM, and integrated circuits malfunctioning can lead to motherboard bricking. If vital parts stop working, it disrupts essential pathways required for the board to function.
Failed capacitors, burnt VRMs, and other damage can prevent power delivery, initialization, and booting.
Overclocking
Pushing hardware past stock speeds via overclocking can provide performance gains but risks damaging motherboards if taken too far. Excessive voltages and heat from uncontrolled overclocks can overload circuits, degrade components over time, and ultimately cause complete bricking or failure to boot.
Electrical surge damage to components
Sudden electrical voltage spikes can overload and fry delicate motherboard components like the BIOS chip, VRMs, and integrated circuits. Once these essential parts sustain damage from an overcurrent surge, they may fail completely, preventing the board from booting or posting. Surge protectors help avoid spikes on the AC line. But severe electrical events can still permanently damage boards through component destruction.
Physical damage to board circuitry
Dropping, bending, mishandling, or improperly installing components can damage fragile motherboard traces, solder points, and integrated circuits. This physical trauma can cause shorts or open circuits that disrupt vital electrical pathways required for operation. Careful handling and anti-static precautions help avoid such harm. But once physical connections are broken, extensive repairs may be needed to fix the damaged circuits to regain functionality.
Water damage or corrosion on the motherboard
Liquid spills and humidity can corrode conductive traces and components on motherboards over time, leading to electrical pathway failures. Preventing exposure to water and prompt drying if spills occur gives the best chance of avoiding permanent short-circuiting damage from corrosion.
Component overheating and failure
Excessive heat buildup can overload and damage motherboard components like CPUs, chipsets, and VRMs. If vital parts overheat and fail, it disrupts essential functions and can lead to a bricked, non-operational motherboard. Adequate cooling helps prevent thermal failure.
BIOS chip becomes corrupted or damaged
The BIOS firmware chip can become corrupted or physically damaged from electrical issues, bad flashes, static discharge, etc. Since the BIOS controls vital functions, a corrupted chip can render a motherboard completely non-functional or “bricked”.
Removal or failure of CMOS battery
The CMOS battery maintains BIOS settings when powered off. If it fails or is removed, the BIOS may reset and corrupt, preventing the motherboard from booting properly when powered on again.
Incorrect wiring causes a short circuit
Faulty wiring and connections can cause damaging shorts on the motherboard. These electrical shorts can destroy circuits and components, rendering the board non-functional until extensive repairs are made.
Faulty power supply frying components
Faulty power supplies can overload and fry critical motherboard components with incorrect voltages. Once essential parts like the CPU, BIOS, or VRMs sustain damage, the board can be permanently bricked and non-operational.
Static electricity discharge onto the motherboard
Static electricity discharge onto the motherboard can damage sensitive integrated circuits and the BIOS chip. This renders the essential components non-functional, potentially bricking the motherboard.
Improper handling and bending of the board
Improper handling of the motherboard, such as bending it, can damage the components on the board and cause it to become bricked.
Debugging/diagnostic jumper left on by mistake
Leaving a debugging or diagnostic jumper enabled on the motherboard by mistake can send incorrect voltages, damaging circuits. This can lead to a bricked board.
Bootloader corruption or drive errors
Corrupted bootloaders or drive errors prevent the motherboard from loading the OS properly. This disruption of the boot process can cause the board to appear bricked.
Outdated drivers conflicting with OS
Using outdated or incompatible drivers can cause conflicts with the motherboard and operating system, leading to startup failures that mimic a bricked board. Updating drivers and settings often resolves these apparent bricking issues caused by driver conflicts.
Security attacks like viruses bricking the board
Malicious software like viruses or malware getting into the boot sector, firmware, or OS kernel can sometimes corrupt key components to the point of bricking the motherboard. Though rare, advanced persistent threats or specially crafted viruses could theoretically damage a motherboard through targeted code execution.
How to Recover or Fix a Bricked Motherboard?
There are several options that you can try to recover or fix a bricked motherboard. Here are some given:
Diagnose the Issue
The first step when troubleshooting a motherboard that fails to boot or post is careful diagnosis to identify the underlying problem. Start by visually inspecting both sides of the PCB for any obvious physical damage.
Look for burnt or bulging capacitors, damaged traces in the laminate, bent pins, or scorch marks that may indicate component failure. Also check for signs of water damage or corrosion around the CPU socket, RAM slots, or battery.
Reseating the CPU, RAM modules, expansion cards, cables, and power connections can also fix basic connection issues. Eliminating loose components is a quick first troubleshooting step. If available, test the motherboard with a proven good power supply, RAM stick, GPU, or other replaceable parts one by one to isolate the fault.
Removing the flat CMOS battery for 5-10 minutes also resets any corrupted BIOS settings that may prevent successful booting. Taking methodical steps to inspect physical damage, reseat connections, swap in working parts, and clear CMOS settings can identify if the issue is easily correctable or will require more advanced BIOS repair techniques. Proper diagnosis guides the troubleshooting process.
Troubleshoot and diagnose the problem
The first step is to troubleshoot and diagnose the problem. This involves inspecting the motherboard for physical damage, reseating the CPU, RAM, cables, and connections, testing with a known good power supply, and clearing the CMOS by removing the battery for 5 minutes.
Attempt BIOS recovery
If the motherboard is not damaged, you can try to recover the BIOS. Locate the CLR_CMOS jumper pins and short them for 10 seconds using a jumper cap to reset BIOS.
Attach an external EEPROM flasher/programmer to the BIOS chip. Use specialized clips if needed. Backup and reflash the boot sector or full BIOS image. Some boards have a dedicated recovery BIOS chip. Switch to this chip and flash from there.
Reflash the BIOS
You can try to reflash the BIOS if BIOS recovery fails. Download the latest stable BIOS file for your exact motherboard model from the OEM website. Get the correct version and file type.
Follow the manufacturer’s instructions precisely for flashing via USB drive or built-in flash utility. Never interrupt the process. After a successful flash, load BIOS setup, reset to optimized defaults, save and exit.
Replace the BIOS chip
If the BIOS chip is damaged, it may need to be replaced. This is a more complicated process and it is best to take your motherboard to a qualified technician for repair.
Replace the motherboard
If the motherboard is severely damaged and not recoverable, it may need to be replaced. This is the most expensive option, but it is the only guaranteed way to fix a bricked motherboard.
Final Thoughts
How to fix a bricked motherboard? Above are the mentioned steps which you can follow to retrieve your motherboard. It badly depends on your motherboard damage.

About Author
I’m Zeshan, a passionate PC builder and gamer with a vision to empower fellow gaming enthusiasts with the best gaming gadgets available in the market. With over seven years of hands-on experience in the gaming industry, I’ve dedicated my life to exploring, testing, and reviewing cutting-edge gaming gear that takes your gaming experience to the next level.