Did you know that you can test your motherboard without CPU? Yes, that’s correct. If you’re purchasing a motherboard and want to check if the motherboard is working, or if you’ve found an old motherboard and want to see if it’s alive or dead, then you don’t need to install a CPU to test it.
Now you may wonder, how can I test a motherboard without a processor? Well, worry not, because from unboxing your motherboard to learning what the beeps mean, this guide will walk you through every step of testing your motherboard without the CPU.
There will be a question in your mind about whether the motherboard turns on without a CPU or not. So if you want to verify your motherboard’s functioning or troubleshoot potential issues without installing a processor, this guide covers you.
Key Takeaways on Testing Motherboards Without CPU
- Separately testing a motherboard outside a case allows you to verify core functionality and spot potential faults.
- The minimum required components to test power are the 24-pin ATX, 8-pin EPS12V connectors, RAM, case power switch, and power supply.
- Watch for indicator lights, POST codes, fan spin, detected hardware, and abnormal smells or components.
- Methodically reseat connections, swap in known working parts, and inspect sockets when troubleshooting.
- Always use anti-static practices, including wrist straps, proper work surfaces, and gentle handling to avoid component damage.
Step-by-Step Instructions for Testing a Motherboard Without CPU
Now you will wonder how to test the motherboard without a CPU installed. Here are the detailed steps you’ll want to follow to fully test a motherboard without having a processor installed:
Step-by-Step Instructions for Testing a Motherboard Without CPU
Now you will be wondering about how to test the motherboard without processor or CPU. Here are the detailed steps you’ll want to follow to fully test a motherboard without having a processor installed:
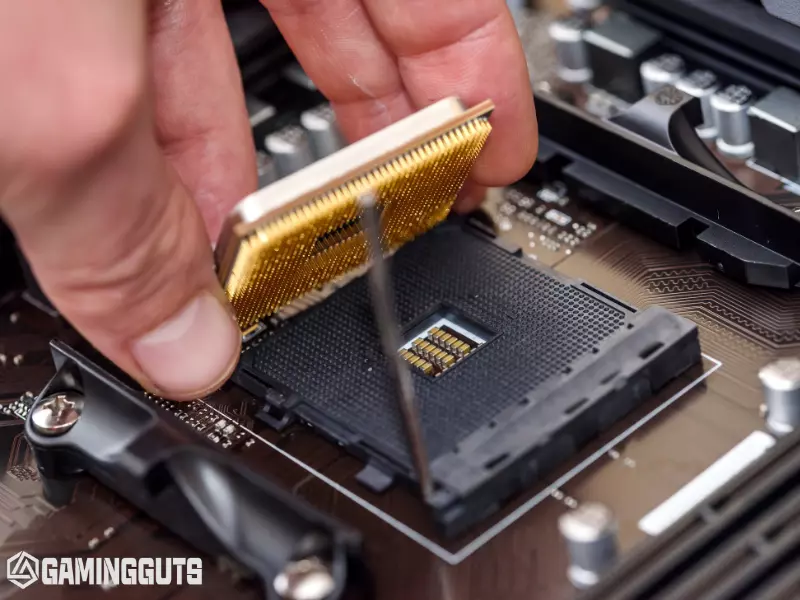
Carefully Unbox Your Motherboard
If the motherboard is inside the case, you don’t need to worry about it while testing it. But if you have a brand new motherboard, then remove the new motherboard from its anti-static bag and original packaging.
Visually inspect the board and components for any signs of physical damage during shipping. Look for things like loose or broken connectors, damaged socket pins, leaking or bulging capacitors, burnt spots on the PCB, etc. Also, take note of the model number and version for reference later.
Place the Motherboard on an Anti-Static Surface
Set the motherboard on a non-conductive surface or on top of the anti-static foam pad or cardboard box it came in. Never place a motherboard directly on a metal surface, as this can create shorts and discharge static electricity that can damage components.
This is because the motherboard has a lot of solder points at the back of the board, which can cause circuit breakage when put on the metallic surface. The anti-static bag or foam provides a safe foundation for testing.
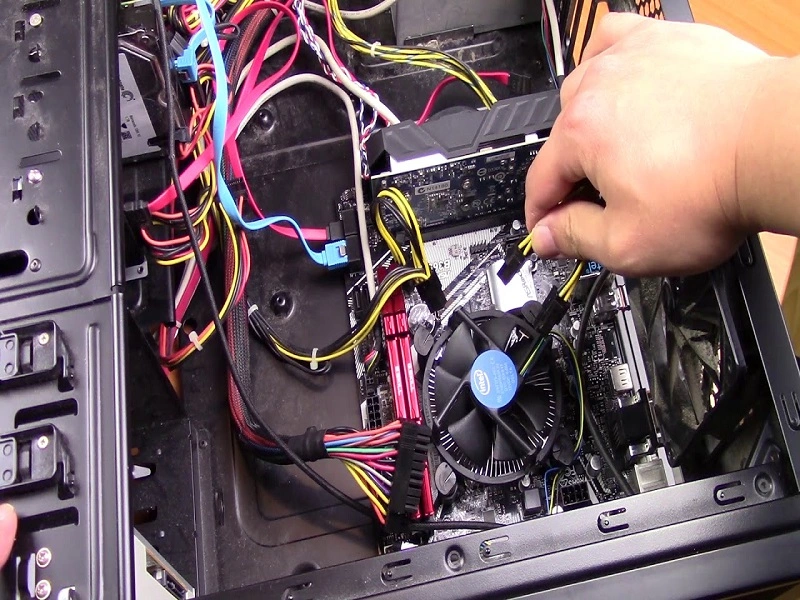
Install CPU Power Connectors
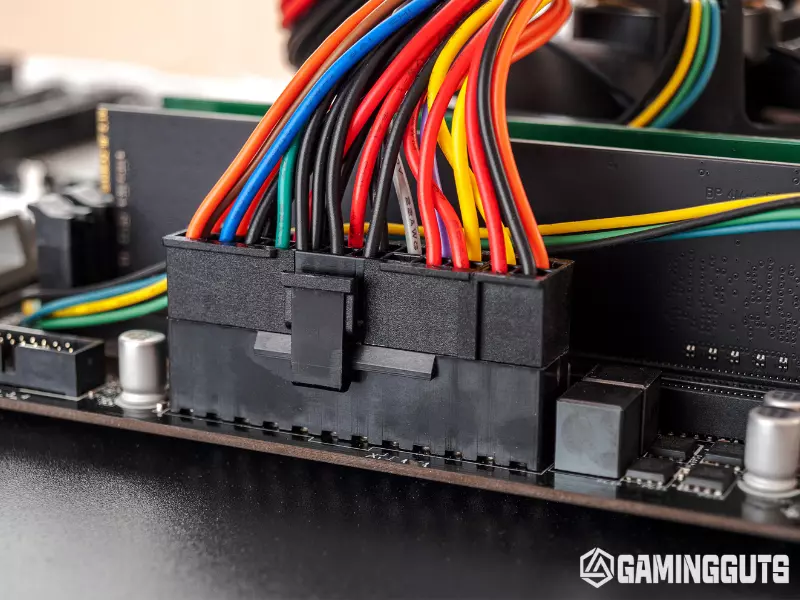
Identify the 24-pin main ATX power supply connector and the 8-pin EPS12V CPU power supply connector on the motherboard. In the motherboard manual, these may be labeled ATX_PWR and EPS12V.
Align the connectors correctly and insert them fully into the motherboard power headers to provide power to the board. Ensure the clips on the connectors latch into place.
Attach Case Power Switch Connector
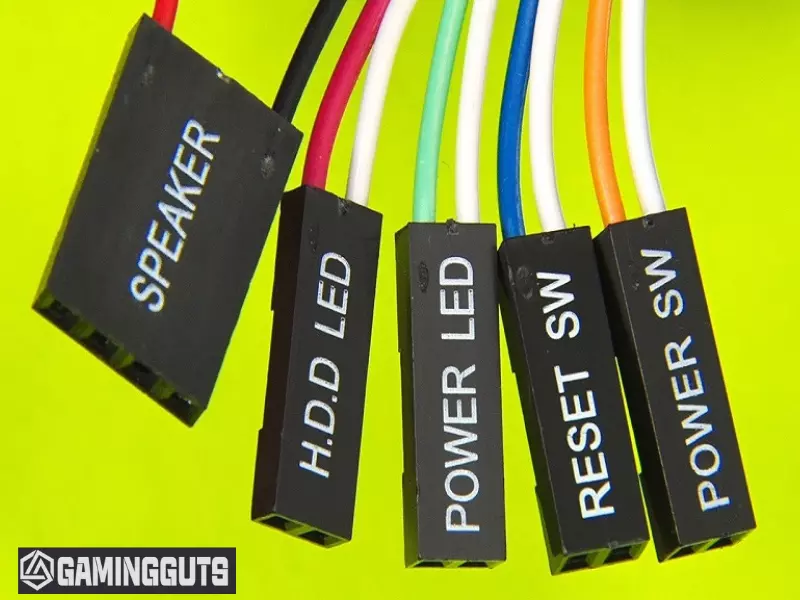
Locate the collection of pins on the motherboard labeled “Front Panel Header” or F_PANEL. Here you will find pins for connecting things like the case power switch, reset switch, power LED, HDD activity LED, and others.
For now, attach the Power Switch connector from your case onto these pins following the pinout in the motherboard manual. This will allow you to turn on the motherboard manually later.
Connect the Power Supply Unit
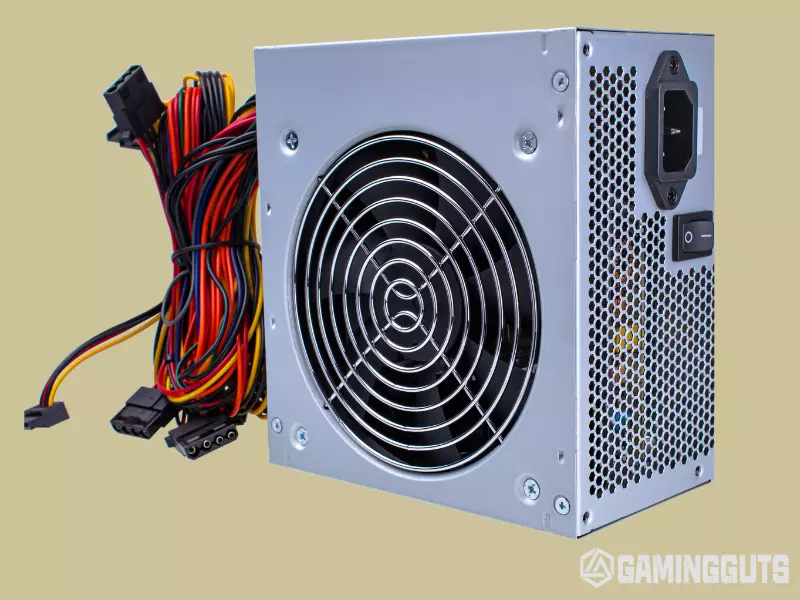
Now, you can connect PSU to your motherboard. Ensure the 24-pin ATX and 8-pin EPS12V CPU connectors are fully inserted into the motherboard power headers. Then connect the power supply unit itself to a nearby grounded electrical outlet to provide power to those connectors.
Make sure the power supply is turned OFF for now. Don’t place the PSU on the metallic surface; you can use the anti-static foam for this purpose.
Insert Additional Components
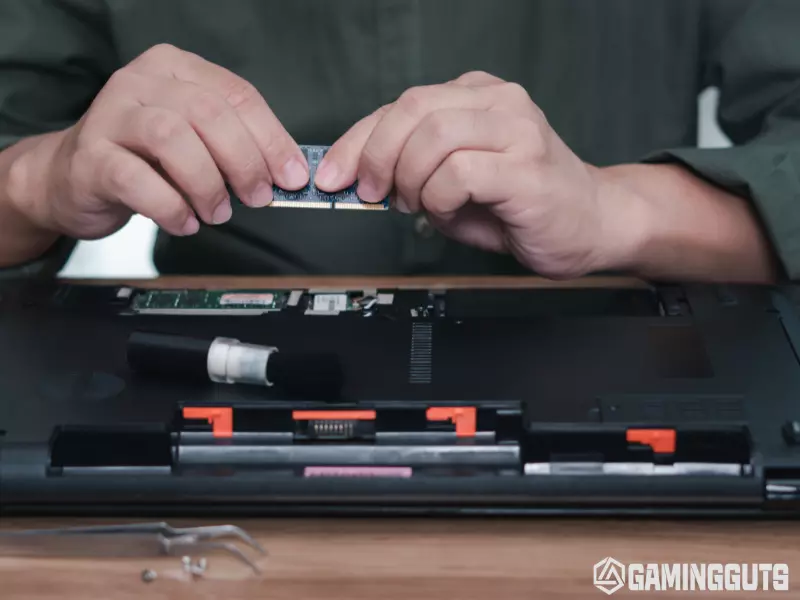
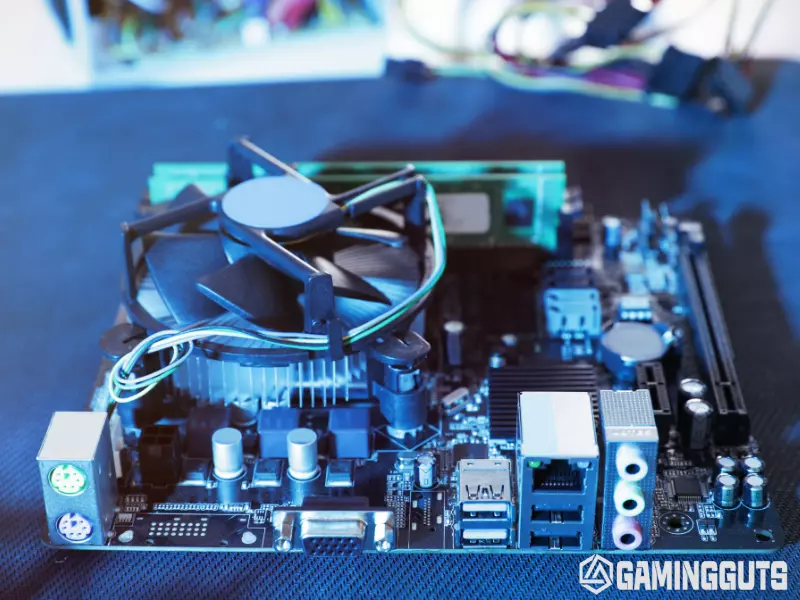
You can insert additional components in the motherboard like RAM, Hard drive, or GPU if you want to. But remember, they wouldn’t have any effect while testing the motherboard as they are useless without the CPU. Locate the memory module slots on the motherboard.
Align a single stick of RAM so the notches match up with the slot, and gently press down evenly on both sides until it clicks firmly into place. Same as you can install the other components as well. Consult your motherboard manual for which slots to populate first if multiple options exist.
Connect the Monitor and Keyboard

Connect a monitor to the integrated video output port on the motherboard and turn the monitor on. It will show you what’s happening after you turn on the motherboard. Also, attach a USB keyboard if your motherboard has integrated USB ports, as this will allow you to enter the BIOS setup screen.
Turn On Your Motherboard
Make sure every important component is connected. Now comes the moment of truth to check your motherboard.
First, make sure your power supply is switched OFF. Then use a screwdriver to carefully short the two Power Switch pins on the front panel header connection according to the pinout diagram for your specific motherboard model. Connect the power supply cable to PSU and turn the switch on. Once the cable is connected and PSU is ON, press the power button on the case to power on the motherboard.
What will you do if the motherboard is outside the case? As discussed earlier, you can place the motherboard on anti-static foam or cardboard. Surely, it will some far away from the case. Remember to wear nonconductive gloves on your hands while working on electrical components.
Observe Performance and Indicator Lights
Watch closely as the motherboard is powered on. Closely notice the beep sound or lights blinking. The CPU and case fan headers should start spinning. LED lights on the board for power status, disk activity, etc., should illuminate appropriately.
Listen for any beep codes from the small onboard speaker, which often signal hardware issues. You will notice these errors since you have not plugged in the CPU. But if you don’t, it indicates that the motherboard that something messy with your motherboard.
Load BIOS Settings Menu

If all appears normal, you should see the BIOS settings screen load on the connected monitor. The Del or F2 key can often be pressed during boot to enter the BIOS setup. Navigate the menus and verify the motherboard correctly detects the RAM and other hardware.
Gracefully Power Down Motherboard
After the testing process is complete, shut down the motherboard gracefully using the instructions in the motherboard manual, usually by choosing a power or reset option in the BIOS menus. Then toggle the power supply switch to OFF and unplug it from the electrical outlet.
Disconnect Cables and Remove Components
Disconnect the case switch, monitor, keyboard, and other cables from the motherboard ports. Unlatch and remove the RAM, CPU power connectors, and other components attached directly to the motherboard. This avoids any damage before transporting or storing.
This comprehensive step-by-step process will allow you to thoroughly validate whether a new motherboard may function correctly before installing all other computer components and transitioning to a full system build.
What to Watch Out for Motherboard Testing
As you power on and test a motherboard sans processor, keep an eye out for these indicators that the board and components are functioning correctly:
Power Lights – LEDs for power status, sleep mode, etc., should light up when the board is powered on via the switches. If not, there is likely an issue receiving power through the 24-pin ATX connector.
Fan Spin Up – Connect case and CPU fans to headers and check that they begin spinning once the board is turned on. No fan rotation indicates a problem with those fan power headers.
Beep Codes – Onboard speakers often emit beep patterns signaling whether hardware like the RAM, GPU, or boot device was detected successfully. Consult motherboard manuals for the meaning behind any beep codes heard.
Debug Displays – Higher-end motherboards have debug LED displays or POST code indicator lights. These show progress booting up and signal any component issues.
BIOS Screens – The setup utility should display if the video signal is working on a connected monitor. The BIOS also indicates if parts like the RAM are detected properly.
Burnt Smells – Any odd smells coming from the board or sight of burnt or cracked components can mean a short circuit or power delivery failure occurred.Paying attention to these basic functions and indicators of motherboard health will help you determine if the board is operating correctly or potentially defective.
Best Practices for Safely Handling Motherboard Components
Follow these guidelines whenever handling motherboards and computer components to avoid electrostatic discharge (ESD) damage:
- Wear an anti-static wrist strap connected to an unpainted metal surface on your computer case or power supply when handling components. This equalizes any static electrical charge between you and the component.
- Only handle or work on components on an anti-static mat surface. Avoid static-generating surfaces like carpets. Also, be sure not to place motherboards directly on top of the metal, which can short the contacts on the bottom.
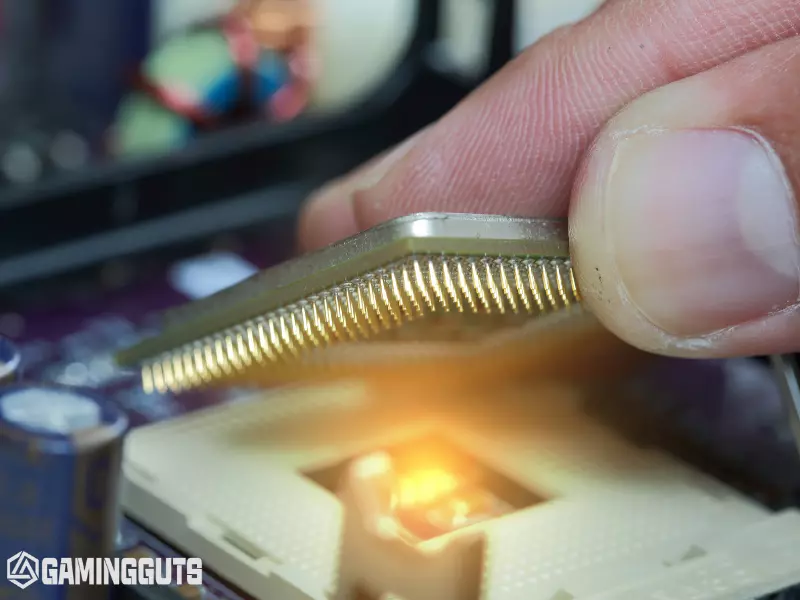
- Avoid handling motherboard circuit boards and contacts as much as possible. Handle by the edges to avoid transferring skin oil and ESD.
- When inserting RAM, CPUs, GPUs, and other devices into sockets, gently align and press down evenly on both sides. Never force insertion, as this can damage sensitive pins and contacts.
- Ensure your computer case standoffs are installed correctly, and the motherboard is seated properly before powering on to prevent electrical shorts.
- Keep liquids well away from motherboards and electronics. Spills can cause shorts and fry components very quickly.
Proper anti-static guidelines and gentle handling will protect your motherboard against expensive damage during testing and assembly.
Final Thoughts
Testing a motherboard without a CPU installed can seem daunting but quite straightforward. By following the steps outlined in this guide, you know to validate a new or old motherboard’s functionality properly.
Ensure you have the basic tools – a compatible power supply, RAM, graphics card, speaker, and breadboard can sufficiently power on and load the board. Listen and watch for beep codes, debug lights, and video output that indicate successful POST.
Additionally, inspect ports and slots for any signs of damage. With some time and diligent testing, you can now have peace of mind knowing your motherboard works before integrating it into your build. The ability to thoroughly validate a motherboard sans processor saves future headaches.
FAQ’s
Can You Run a Motherboard Without CPU?
You can test the motherboard without installing the CPU by connecting the 8-pin CPU power connector and shorting the power switch pins to turn on the motherboard. This will allow you to see if the motherboard may power up and [indicate that the motherboard] has power.
Can I Test Motherboard Without Cpu and Ram?
It is possible to test a motherboard without the CPU or RAM installed. [PC builders] can easily test a new motherboard by connecting the 8-pin CPU power, installing a case fan close to the motherboard, and shorting the power switch pins. This will [turn on your motherboard] and allow you to check if your motherboard powers on.
Can a Motherboard Show Bios Without Cpu?
Yes, a motherboard can show the BIOS screen without a CPU installed by connecting power and shorting the power switch pins to turn on the board.
Can You Damage a Motherboard by Testing Without a Cpu?
No, there is no risk of damage by powering on a motherboard without a CPU installed. The CPU socket and related circuitry are designed for this.
Can a Motherboard Bios Boot Without a Cpu?
No, the CPU must be installed for the BIOS and boot process. However, some motherboards allow BIOS flashing without a CPU via buttons and USB BIOS flashback.
How Can You Tell If a Motherboard Is Dead?
No power, no lights, fans won’t spin and no beep codes or display output are all signs a motherboard may be dead. Testing without a CPU can help confirm.
Is It Safe to Build a Pc Outside of the Case?
Yes, assembling components on a bench or open-air test is common amongst builders and is safe if proper precautions are taken.

About Author
I’m Zeshan, a passionate PC builder and gamer with a vision to empower fellow gaming enthusiasts with the best gaming gadgets available in the market. With over seven years of hands-on experience in the gaming industry, I’ve dedicated my life to exploring, testing, and reviewing cutting-edge gaming gear that takes your gaming experience to the next level.

![How Many SATA Ports Do I Have? [Complete 2024 Guide]](https://gamingguts.com/wp-content/uploads/2023/09/How-Many-SATA-Ports-Do-I-Have.png)